- Get link
- Other Apps
- Get link
- Other Apps
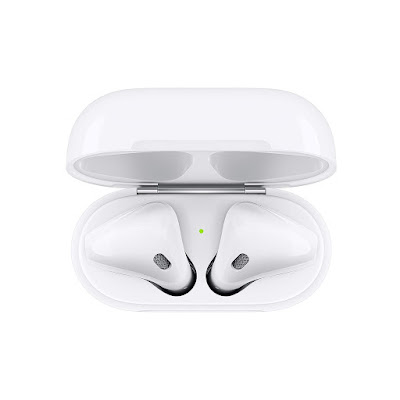
Apple's wireless earbuds, AirPods, have revolutionized the way we listen to music, make calls, and interact with our devices. While they're primarily designed for use with iPhones and other Apple devices, they can also be easily connected to laptops, including both MacBooks and Windows PCs. If you're wondering how to connect your AirPods to your laptop, whether it's for work, entertainment, or just for convenience, this guide will walk you through the process step by step.
1. Ensure compatibility
Before trying to connect your AirPods to your laptop, it's important to make sure that your laptop supports Bluetooth connectivity. Most modern laptops come equipped with Bluetooth capabilities, but it's always a good idea to double-check to avoid any compatibility issues.
2. Activate Bluetooth on your laptop
- The next step is to activate Bluetooth on your laptop if it is not already enabled. The method to enable Bluetooth varies depending on your laptop's operating system.
- For Windows: Go to the Start menu and open Settings. From there select Devices, then Bluetooth & other devices. Toggle the Bluetooth switch to the On position.
- For macOS: Click the Apple menu in the upper-left corner of your screen and choose System Preferences. Then, click Bluetooth and make sure the Bluetooth checkbox is selected to turn it on.
3. Put your AirPods in pairing mode
- To connect your AirPods to your laptop, you need to put them in pairing mode. Here's how to do it:
- If your AirPods are in the charging case, remove them.
- Open the charging case lid.
- Press and hold the Setup button on the back of the charging case until the status light flashes white.
4. Pair your AirPods with your laptop
Once your AirPods are in pairing mode, you can proceed to pair them with your laptop:
For Windows: In the Bluetooth settings menu, click "Add Bluetooth or another device." Select "Bluetooth" from the list of device types. Your laptop will start searching for nearby Bluetooth devices. When you see your AirPods listed, click on them to begin the pairing process. Follow any on-screen instructions to complete pairing.
For macOS: In the Bluetooth preferences pane, your AirPods should appear in the list of available devices. Click on your AirPods to select them and then click the "Connect" button next to their name. Follow any on-screen prompts to complete the pairing process.
5. Test your connection
Once the pairing process is complete, you will be able to use your AirPods with your laptop. Test the connection by playing some music or video on your laptop and make sure the audio is routed to your AirPods.
6. Adjust Settings (Optional)
Depending on your preferences, you may want to adjust some settings related to your AirPods. For example, you can customize the double-tap functionality of your AirPods to perform various actions like playing/pausing music, skipping tracks, or activating Siri.
Connecting your AirPods to your laptop is a straightforward process that allows you to enjoy the convenience of wireless audio and hands-free communications. By following the steps outlined in this guide, you can quickly and easily pair your AirPods with your laptop, whether you're using a Windows PC or a MacBook. Once connected, you'll be able to enjoy the freedom and flexibility that AirPods provide, enhancing your overall listening and communication experience.

Comments
Post a Comment